Table of Contents
What is MySQL Workbench?
MySQL Workbench is a GUI tool to manage your database. You can see the tables, records in the table, you can create a new schema, query, etc.
If you are more of a visual person who needs to deal with database (MySQL), MySQL Workbench is a very powerful and useful tool.
Before Installing MySQL Workbench on macOS
Before installing the MySQL Workbench, make sure you have access to the database. It is either db in your local system or it could be a remote database in your hosting server or even cloud database such as AWS RDS.
In this post, I will be using local MySQL server as an example. Please check out this post on installing MySQL server on your Mac.
Installing MySQL Workbench on macOS
Go to https://dev.mysql.com/downloads/workbench/
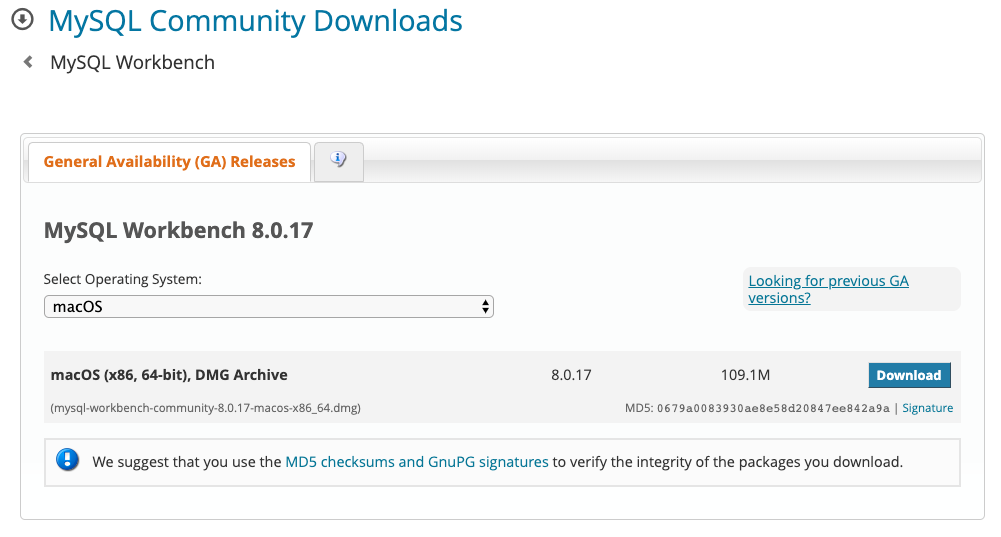
Click Download to get the DMG installer
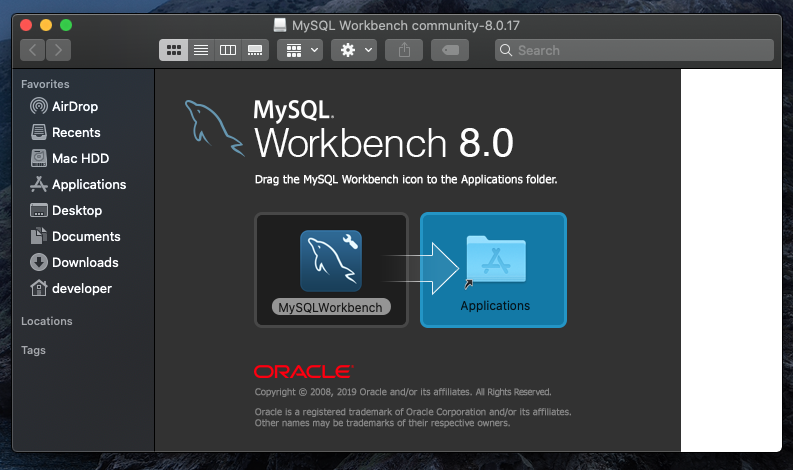
Once Installer is downloaded, double click the installer. When you double clicked, you should see the screen like below. Follow the instruction to drag the MySQL Workbench icon to the Application folder to complete the installation of MySQL Workbench into your system.
Launching the MySQL Workbench App
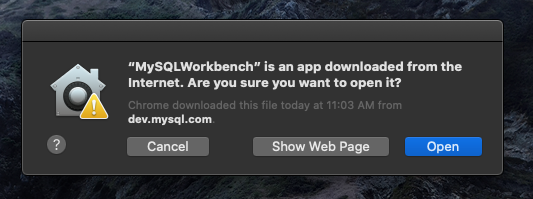
Once the MySQL Workbench is installed and when you try to open the app, you might see the message like below. Press Open to proceed on launching the application.
Once the start up screen shows up, you will see a connection already added (assuming you have installed local MySQL server)
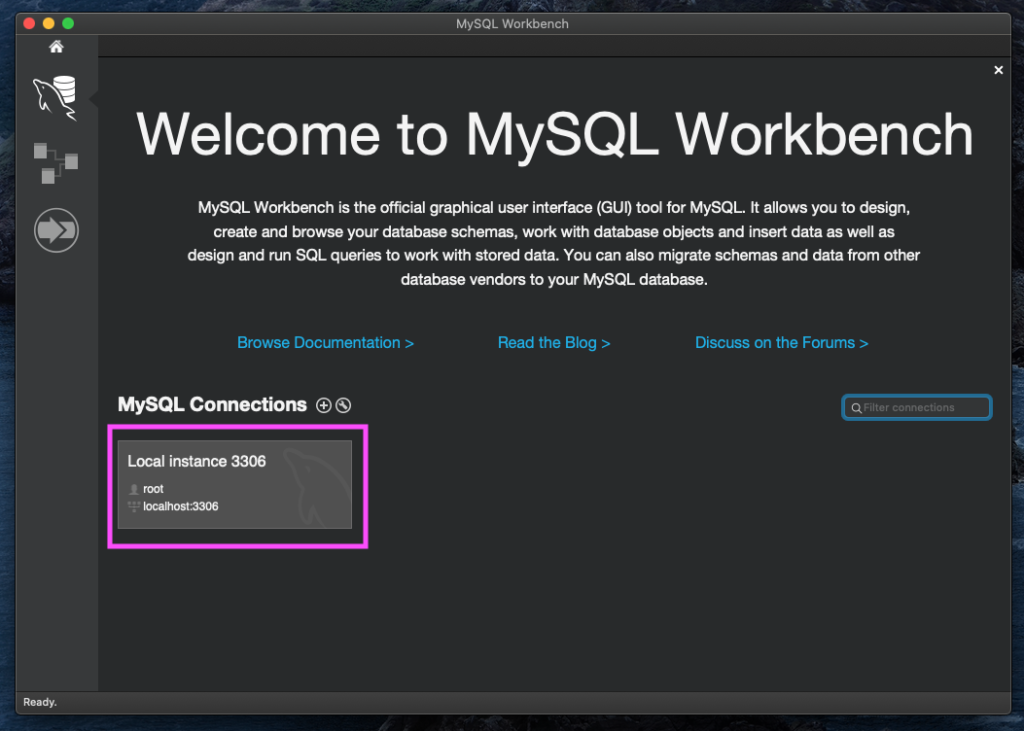
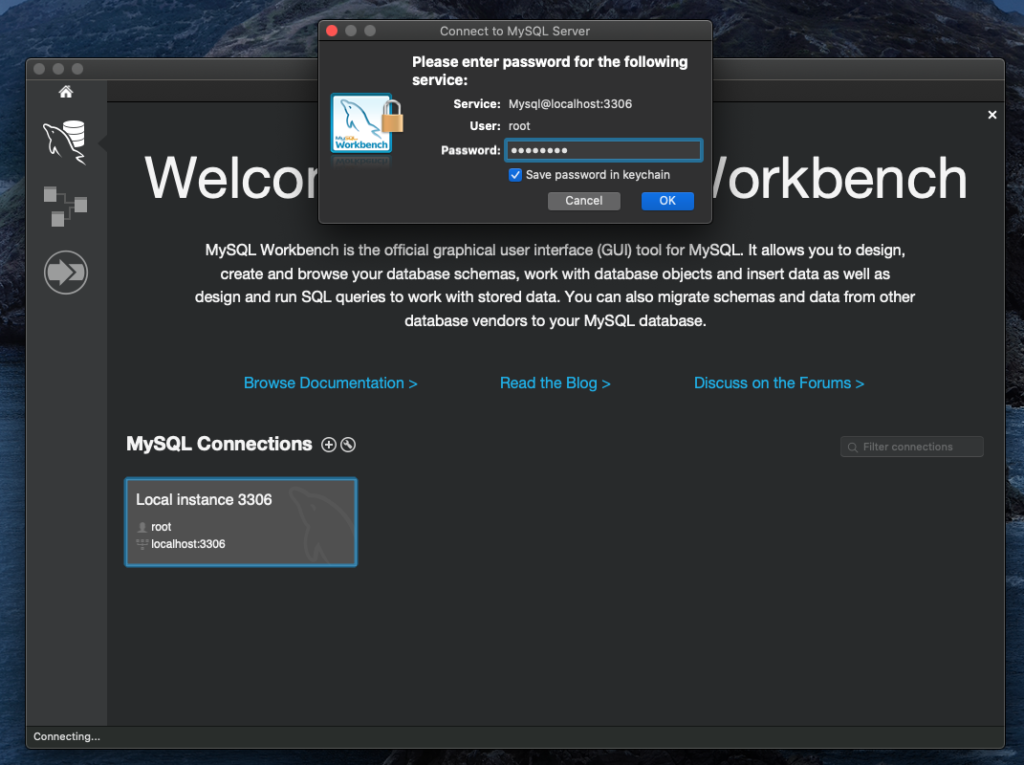
Click the Local instance 3306. It will ask for the password. Enter the password you entered when you set up the local MySQL server and press OK. (You can check the Save password in keychain. In this way you do not need to type the password every time you access to your database)
Creating the Schema
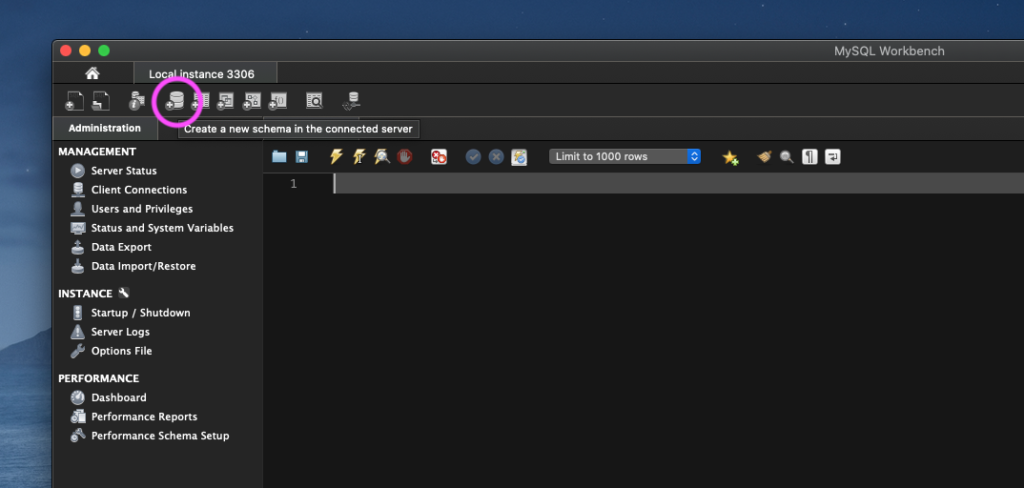
Now you have access to your local database server (MySQL server). You can start creating your own database. Schema is the main container of database where you put the tables. Let’s try to create a schema. Click the Create New Schema icon (highlight in below screenshot)
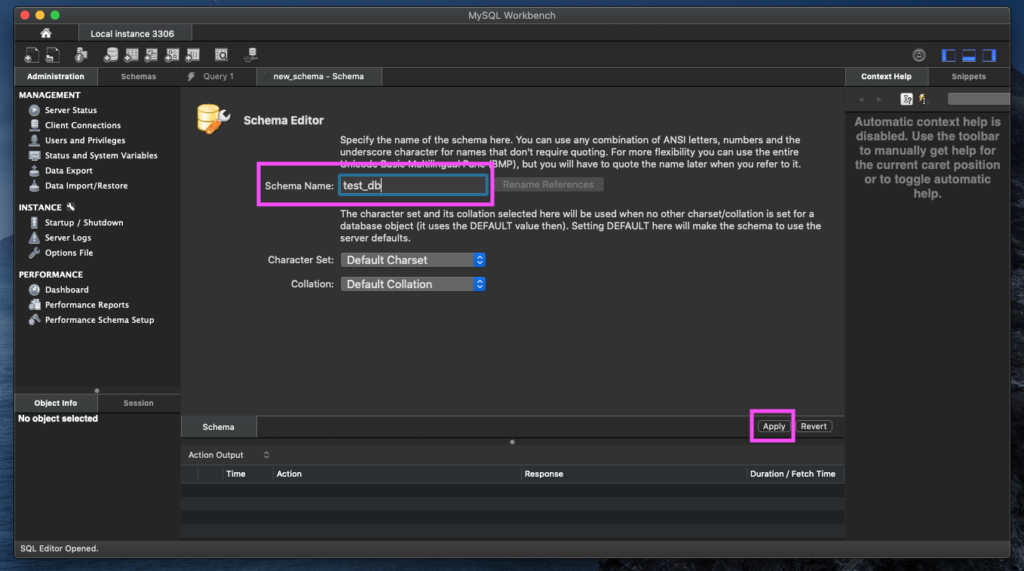
Assign some name on your new schema. In this example, let’s use test_db as a schema name and press Apply.
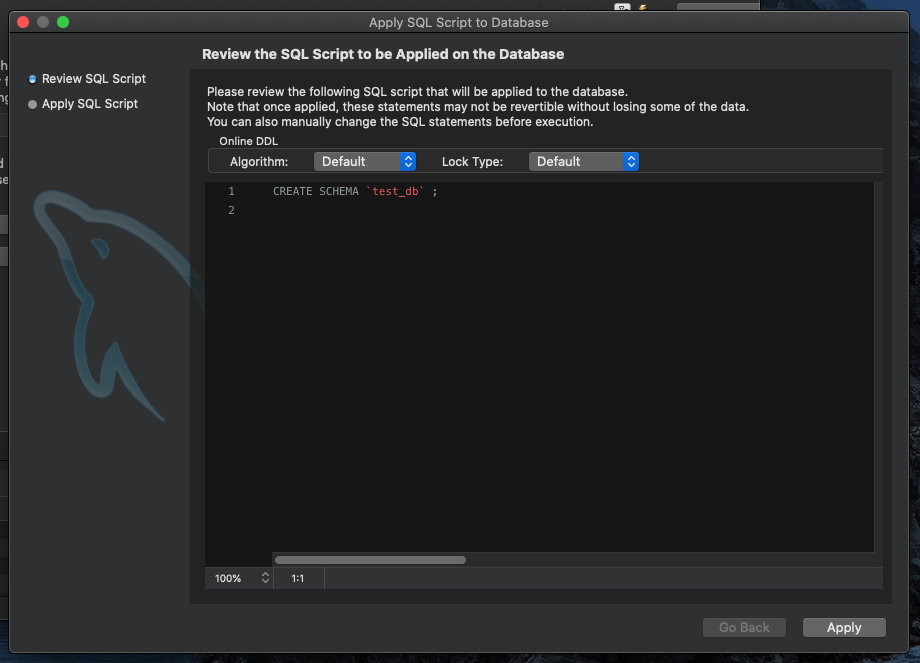
You will see a dialog box to review the SQL Script to execute by an app. Basically, it will execute an SQL statement of CREATE SCHEMA `test_db`;
Press Apply to create a new schema.
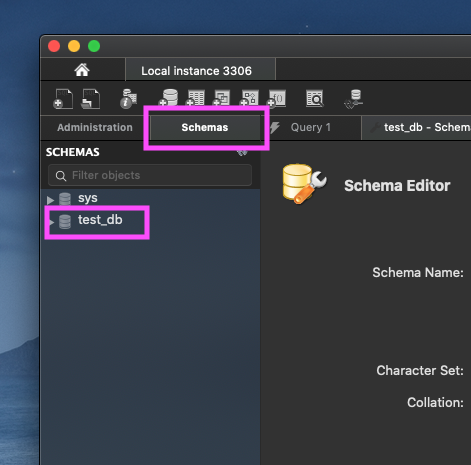
Select Schemas tab and verify the new schema is added.
Creating the Table
Once schema is created, you need to create a table to actually store the data in the “database”.
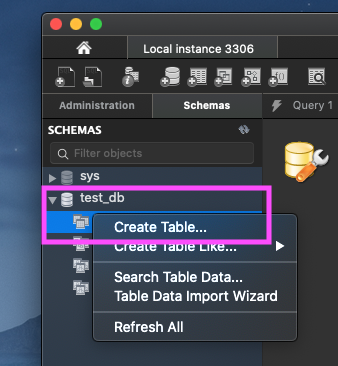
Expand the test_db schema and right click on the table.
Select Create Table...
Start entering values in the column section. This will be the identifier for the specific field in the database.
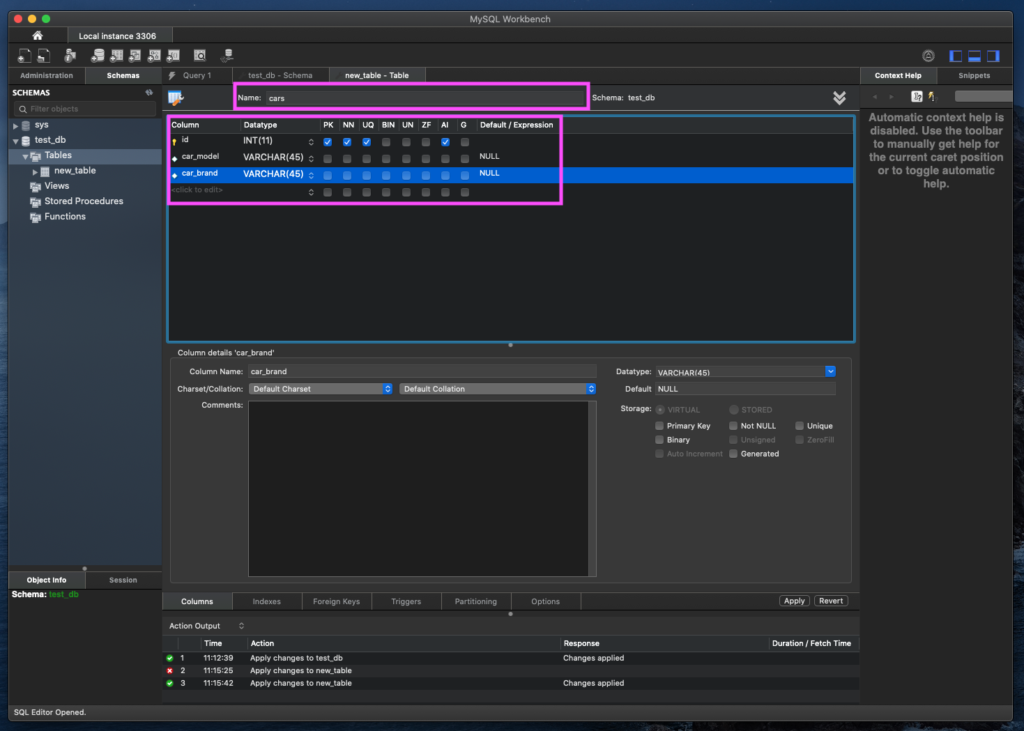
Name: carsEnter the following entities in the table.
| Column | Datatype | PK | NN | UQ | BIN | UN | ZF | AI | G |
| id | INT(11) | X | X | X | X | ||||
| car_model | VARCHAR(45) | ||||||||
| car_brand | VARCHAR(45) |
PK - Primary Key. Usually the “id” will be your primary key.
NN - Not Null. For entities, you don’t not want to have Null value (empty value) by the time the record is inserted. Put check on this if there is a specific entity you want have some value on it. For example, id entity must have a value always. So for id, put check on NN.
UQ - Unique. If the record entered in the table needs to be unique, put check on this. For example, “id” must be unique so that when you query for specific id, it will only return 1 result.
BIN - Binary
UN - Unsigned
ZF - ZeroFill
AI - Auto Increment. For values you want to automatically increment, put check on this. Typically id should have auto increment on. So every time there is a new record added, the id value will auto increment.
G - Generated
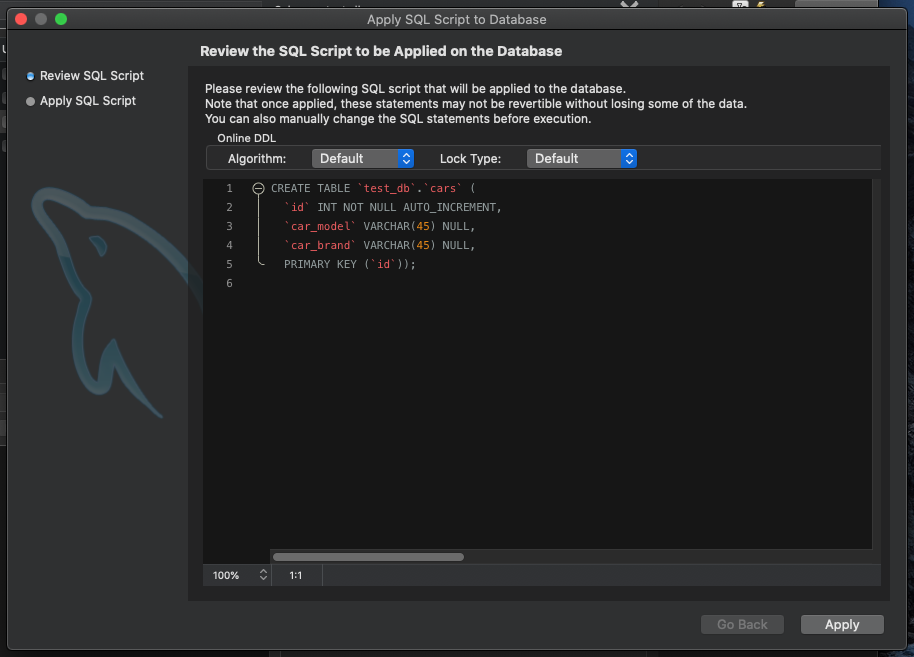
Press Apply and you will the above confirmation. Press Apply again to add some records in your table.
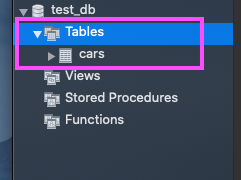
Go to your schema, and expand the table. You should be able to see the table you just created.
Access to the Table
To view the table you created, go to the table you created.
Right click and select Select Rows - Limit 1000
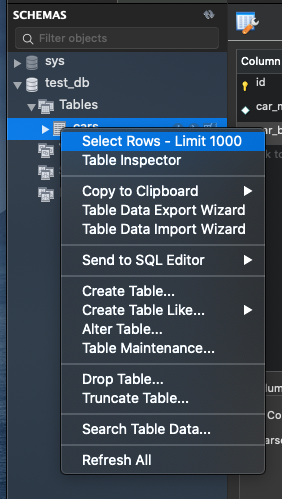
At this point, the table has 0 record. This is expected since the table has just created.
Adding Sample Records
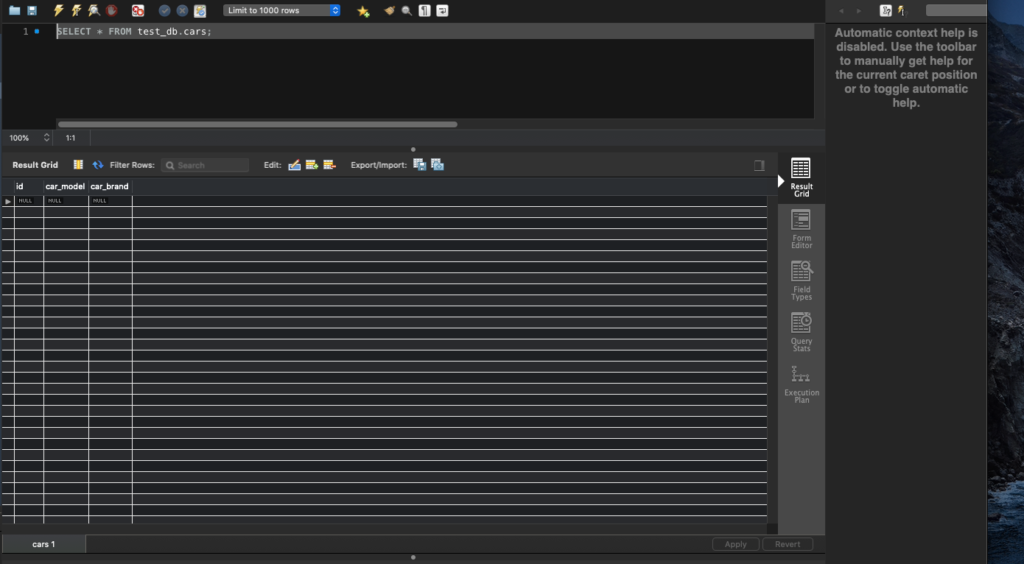
Once you have your table opened, you can directly add some records to it by simply double click the columns. Try entering the following records as an example and press Apply.
| id | car_model | car_brand |
| <leave this blank> | civic | honda |
| <leave this blank> | corolla | toyota |
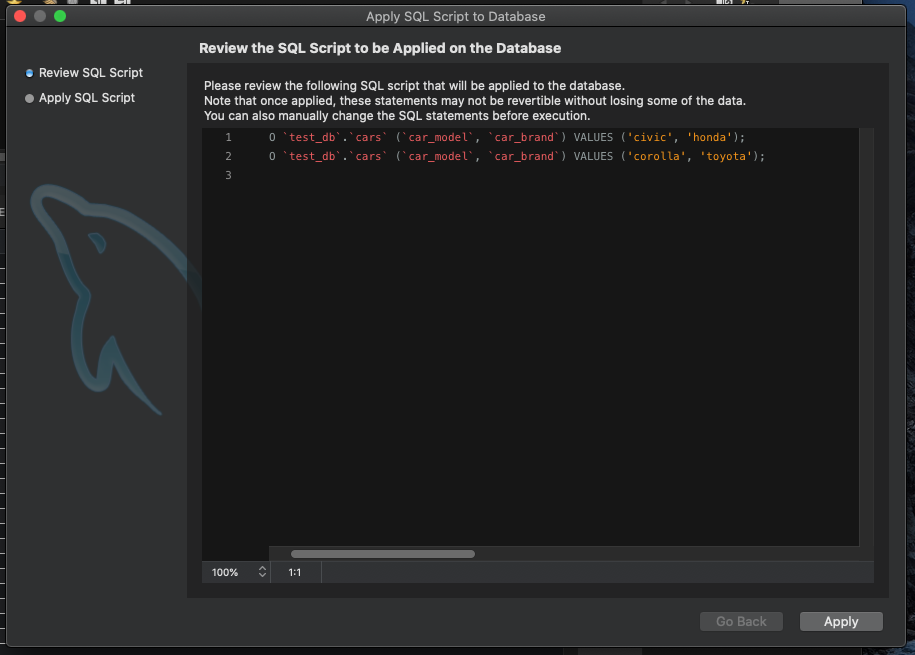
Press Apply to confirm the records you want to add in the table.
Note: You can leave the id column blank since this column is set to auto increment. It will automatically assign value as a new record is added.
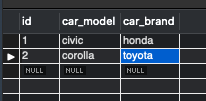
Now you can see there are 2 records added in your table. You can see the id is automatically added in ascending value.
If you are using Big Sur on Apple’s new Silicon M1, checkout Using MySQL Workbench on macOS Big Sur blog post.
Latest Posts
- How to convert MD (markdown) file to PDF using Pandoc on macOS Ventura 13
- How to make MD (markdown) document
- How to Install Docker Desktop on mac M1 chip (Apple chip) macOS 12 Monterey
- How to install MySQL Workbench on macOS 12 Monterey mac M1 (2021)
- How to install MySQL Community Server on macOS 12 Monterey (2021)